LowProfile
我的笔记
我的项目
后台
Vue
一些Vue的问题
# 监视,watch和watchEffect 2025.03.01 watch 和 watchEffect 的区别: | 特性 | `watch` | `watchEffect` | | ---------------- | ------------------------------------- | ------------------------------ | | **依赖收集方式** | 显式指定监听源 | 自动收集回调内的响应式依赖 | | **初始执行** | 默认不执行,需 `immediate: true` | 立即执行 | | **回调参数** | 提供新值 (`newVal`) 和旧值 (`oldVal`) | 无参数,直接访问最新值 | | **适用场景** | 精确监听特定数据变化 | 依赖变化自动触发,简化代码逻辑 | - **用 `watch` 当**: - 需要明确知道新旧值变化 - 仅在特定数据变化时触发 - 需要延迟执行(`immediate: false`) - **用 `watchEffect` 当**: - 依赖多个值且自动追踪更方便 - 需要立即执行一次(如初始化请求) - 简化代码结构(避免重复声明依赖) ## watch watch 需要指定监听的值。 基本语法: ```vue <script setup> import { ref, watch } from 'vue'; const count = ref(0); // 监听单个 ref watch(count, (newVal, oldVal) => { console.log(`Count changed: ${oldVal} → ${newVal}`); }); // 监听多个源(数组形式) watch([count, otherRef], ([newCount, newOther], [oldCount, oldOther]) => { // 处理变化 }); // 监听 reactive 对象的属性(需用函数返回) const state = reactive({ value: 0 }); watch(() => state.value, (newVal) => { // ... }); // 立即执行 + 深度监听 watch( () => state.someObject, (newVal) => { // 深度监听对象内部变化 }, { immediate: true, deep: true } ); </script> ``` ## watchEffect watchEffect 会自动监听函数中所有的值。并且会初始化执行一次。 基本用法: ```vue <script setup> import { ref, watchEffect } from 'vue'; const count = ref(0); const name = ref('Vue'); // 自动追踪依赖(count 和 name) watchEffect(() => { console.log(`Count: ${count.value}, Name: ${name.value}`); }); // 停止监听(通过返回值) const stop = watchEffect(() => { /* ... */ }); stop(); // 手动停止 </script> ``` # v-for与v-if同时使用 2025.02.25 官网解释:[列表渲染 | Vue.js](https://cn.vuejs.org/guide/essentials/list#v-for-with-v-if) 当它们同时存在于一个节点上时,`v-if` 比 `v-for` 的优先级更高。这意味着 `v-if` 的条件将无法访问到 `v-for` 作用域内定义的变量别名: ```html <!-- 这会抛出一个错误,因为属性 todo 此时 没有在该实例上定义 --> <li v-for="todo in todos" v-if="!todo.isComplete"> {{ todo.name }} </li> ``` 如果在外层使用 v-for,内层使用 v-if: ```html <!-- 这会很浪费性能,因为v-for会创建出多个元素, 即使有些li不满足条件没有被渲染,但是外层的div还是被渲染了 --> <div v-for="todo in todos"> <li v-if="!todo.isComplete"> {{ todo.name }} </li> </div> ``` 但是可以使用 template 标签来代替: ```html <!-- template 元素是虚拟元素,不会被渲染在 DOM 中 --> <template v-for="todo in todos"> <li v-if="!todo.isComplete"> {{ todo.name }} </li> </template> ``` # axios传递数组参数 2025.02.13 使用 axios 传递数组参数时,最终的请求参数格式是带有 `[]` 符号的, 前端发送请求代码: ```ts export function searchUsersByTags(tagNameList: string[]) { return myAxios.get("/user/search/tags", { params: { tagNameList: tagNameList } }) } ``` 后端接收请求代码: ```java @GetMapping("/search/tags") public R<List<User>> searchByTags(@RequestParam(required = false) List<String> tagNameList) { if (CollectionUtils.isEmpty(tagNameList)) throw new BusinessException(CodeEnum.PARAMS_ERROR); return R.success(userService.searchUsersByTags(tagNameList)); } ``` 比如理想的格式是: ``` /user/search/tags?tagNameList=Java&tagNameList=c&tagNameList=php ``` 而实际上是: ``` /user/search/tags?tagNameList[]=Java&tagNameList[]=c&tagNameList[]=php ``` 所以这样就会出现 400 错误,请求达到不了接口。 解决方案: + 使用 qs 库 安装 qs 库: ```bash npm install qs ``` 在发送请求的代码中使用: ```ts import qs from "qs"; // 安装 qs 库:npm install qs export function searchUsersByTags(tagNameList: string[]) { return myAxios.get("/user/search/tags", { params: { tagNameList: tagNameList }, // 使用 qs 库将数组序列化为适合 Spring MVC 的格式 paramsSerializer: (params) => { return qs.stringify(params, { arrayFormat: "repeat" }); }, }); } ``` 这样生成的请求是: ``` /user/search/tags?tagNameList=C++&tagNameList=Java&tagNameList=Go ``` + 将请求参数转为带逗号的字符串 ```ts export function searchUsersByTags(tagNameList: string[]) { return myAxios.get("/user/search/tags", { params: { tagNameList: tagNameList.join(",") // 将数组转为逗号分隔字符串 } }); } ``` 这样生成的请求是: ``` /user/search/tags?tagNameList=C++,Java,Go ``` 这样后端可以自动解析。 + 使用 post 请求,将数组放在请求体 # Vue3的setup语法糖中使用this 2025.01.09 在 Vue3 的 setup 函数中,this 对象是默认不可使用的,需要借助`getCurrentInstance`来获取组件实例: ```js const { proxy } = getCurrentInstance(); // 获取组件实例 ``` 这个 proxy 就是 this 对象。 # 动态渲染组件 2025.01.07 在 Vue 中,动态渲染组件可以通过 `<component>` 标签结合 `is` 属性实现。动态渲染组件的主要场景包括根据数据动态加载不同的组件内容、实现步骤式页面、多标签页内容切换等。以下是动态渲染组件的完整用法整理和最佳实践。 ------ ### 基本用法 Vue 提供了 `<component>` 特殊标签,用于动态加载指定的组件。通过 `:is` 属性的绑定,Vue 可以根据绑定的值动态切换当前渲染的组件。 ```vue <template> <div> <!-- 动态渲染组件 --> <component :is="currentComponent"></component> </div> </template> <script lang="ts" setup> import ComponentA from "@/components/ComponentA.vue"; import ComponentB from "@/components/ComponentB.vue"; const currentComponent = ref("ComponentA"); // 默认加载 ComponentA // 组件名称必须与已注册的组件名称一致 </script> ``` ------ ### 动态渲染的步骤 #### 1. 定义动态组件 创建若干个需要动态渲染的组件,确保这些组件已经正确导入或全局注册。 ```js import ComponentA from "@/components/ComponentA.vue"; import ComponentB from "@/components/ComponentB.vue"; ``` #### 2. 使用 `<component>` 标签 在模板中,通过 `is` 属性动态设置当前渲染的组件。 ```vue <component :is="currentComponent"></component> ``` #### 3. 修改绑定值以切换组件 通过更改 `currentComponent` 的值切换不同的组件。 ```js currentComponent.value = "ComponentB"; ``` ### 动态渲染的高级用法 #### 1. **条件加载组件** 动态组件可以结合 `v-if` 条件渲染,仅在需要时加载组件。 ```vue <template> <div> <component v-if="shouldShow" :is="currentComponent"></component> </div> </template> ``` #### 2. **懒加载组件** Vue 支持异步组件加载,可以在需要时按需加载组件,减少初始化时的资源开销。 ```js import { defineAsyncComponent } from "vue"; const LazyComponent = defineAsyncComponent(() => import("@/components/LazyComponent.vue") ); ``` 绑定组件时直接使用异步组件: ```vue <component :is="LazyComponent"></component> ``` #### 3. **动态组件缓存** 为了避免频繁切换组件时重新渲染,可以使用 `<keep-alive>` 标签对动态组件进行缓存。 ```vue <keep-alive> <component :is="currentComponent"></component> </keep-alive> ``` # 路由匹配404 2025.01.06 在路由中配置,没有被匹配上的路由都匹配到 404 页面: ```json const routes = [ { path: "/", name: "Home", redirect: "/index", }, { path: "/index", name: "Index", component: IndexPage, }, { path: "/detail/:articleId", name: "Detail", component: DetailPage, }, { path: "/404", name: "NotFound", component: NotFound, }, { path: "/500", name: "Error", component: Error, }, // 捕获所有未定义路径,跳转到 404 页面 { path: "/:pathMatch(.*)*", // Vue Router 4.x 的通配符写法 name: "CatchAll", redirect: "/404", // 重定向到 404 页面 }, ]; ``` + `path: "/:pathMatch(.*)*"`:这是 Vue Router 4.x 中的通配符路径写法,表示匹配任意路径,包括嵌套路径。 + `redirect: "/404"`:未匹配的路径会被重定向到 `"/404"`,从而加载 404 页面。 Vue Router 会按照路由的定义顺序匹配路径,通配符规则应放在配置文件的末尾,以免覆盖其他合法路由。 # 路由跳转自动滚到页顶 2025.01.06 在创建路由的时候可以配置滚动行为,显式设置 `scrollBehavior`,确保页面加载时始终滚动到顶部: ```js export default createRouter({ history: createWebHistory(), routes, scrollBehavior() { return { top: 0 }; // 每次进入页面都滚动到顶部 }, }); ``` # VueRouter路由跳转+携带参数 2025.01.06 ## 路由跳转 路由跳转有两种方式: + 通过 path:直接指定路径字符串,可以显式地拼接动态参数或查询参数。 + 通过 name:指定路由名称,并通过 `params` 或 `query` 传参。 有个路由: ```json { path: "/detail", name: "Detail", component: DetailPage, }, ``` 两种方式跳转: ```js const router = useRouter(); // 通过 path 跳转 router.push("/detail") router.push({ path: "/detail"}) // 通过 name 跳转 router.push({ name: "Detail"}); ``` ## 携带参数 Vue Router 支持两种参数类型: - **动态参数(`params`)**:用于动态路由的路径部分,通常定义在路由配置中。 - **查询参数(`query`)**:附加在 URL 的查询字符串中(如 `?key=value`)。 有个路由: ```json { path: "/detail/:articleId", name: "Detail", component: DetailPage, }, ``` + 这个 articleId 就是动态参数 使用 path 跳转路由时,不能使用 params,只能在 url 路径中拼接动态参数,或者使用 query 携带查询参数: ```js router.push({ path: "/detail/1", // 参数 articleId 为 1 query: { title: "title1", } }) ``` + 以上最终的跳转路径为:/detail/1?title=title1 使用 name 跳转路由时,必须使用 params 来携带动态参数,或者使用 query 携带查询参数: ```js router.push({ name: "Detail", params: { articleId: 1, }, query: { title: "title1", } }) ``` + 以上代码最终的路径为:/detail?title=title1 ## 接收参数 动态参数存储在 route.params 中。查询参数存储在 route.query 中: ```js const route = useRoute(); // 接收动态参数,两种方式 const { articleId } = route.params; const articleId = route.params.articleId; // 接收查询参数,两种方式 const { title } = route.query; const title = route.query.title; ``` # elementplus上传文件 2025.01.03 使用 element plus 中的 el-upload 组件实现上传文件。 ## 组件 在若依或其他项目中时,直接使用该组件的 action 属性来实现上传时,请求没有携带用户的 token 和 cookie 信息,所以关闭该组件的自动上传,获取到选择的文件,然后手动上传: ```html <el-upload ref="upload" action="#" list-type="picture-card" :auto-upload="false" :limit="1" :on-exceed="handleExceed" :on-change="handleChange"> <el-icon> <Plus/> </el-icon> <template #file="{ file }"> <div> <img class="el-upload-list__item-thumbnail" :src="file.url" alt=""/> <span class="el-upload-list__item-actions"> <span v-if="!disabled" class="el-upload-list__item-delete" @click="handleRemove(file)" > <el-icon><Delete/></el-icon> </span> </span> </div> </template> </el-upload> ``` 这个组件的效果是这样的: 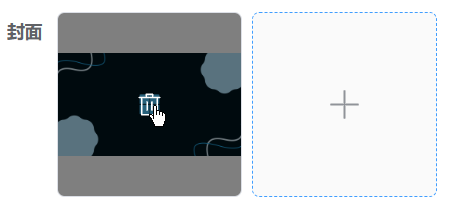 `on-change` 属性绑定的 handleChange 方法会在文件状态发生改变时调用,会将当前文件作为参数传过去,那当选择了文件后,就可以在该方法中获取并保存这个文件对象: ```js let coverObj = null; const handleChange = (file: UploadFile) => { coverObj = file } ``` 注意,该对象中 `raw` 属性才是真正的文件对象: ```js const handleChange = (file: UploadFile) => { coverObj = file console.log("file: ", file) console.log("file.raw: ", file.raw) } ```  那么提交的时候,就将该 file.raw 对象传给后端。有两种方式。 ## FormData方式 使用 FormData 格式来传递文件,注意,使用 FormData 时需要将请求头中的 Content-Type 的值设为 `multipart/form-data`,否则上传不成功(一般 axios 会自动设置,如果没有就手动设置): ```js let formData = new FormData(); formData.append("file", coverObj.raw); uploadCover(formData) function uploadCover(data) { return request({ url: "/ehr/article/upload_cover", method: "post", data: data, headers: { "Content-Type": "multipart/form-data", }, }); } ``` 后端接收: ```java @PostMapping("/upload_cover") public AjaxResult uploadCoverPhoto(MultipartFile file) { System.out.println(file); return toAjax(1); } ``` ## Base64方式 将拿到的文件转为 base64 字符串,然后直接将字符串传给后端,后端再将字符串进行解码转为图片,再继续操作。 # 引入monaco editor 2024.09.21 参考文章: + https://blog.51cto.com/u_11202979/10071426 + https://blog.csdn.net/jyn15159/article/details/126832447 monaco editor是一个微软开源的代码编辑器组件。 ## 基本使用 安装: ```bash npm i monaco-editor ``` 在项目中使用时,需要一个页面元素来挂载: ```vue <template> <div id="editorContainer" style="height: 250px; width: 100%"></div> </template> ``` 创建编辑器实例并挂载: ```js let editor; onMounted(() => { editor = monaco.editor.create(document.querySelector("#editorContainer"), { value: "// 请在此处编写java代码", // 编辑器默认的内容 language: "java", // 默认的语言 automaticLayout: true, // 自动布局 theme: "vs-dark", // 主题,黑暗 fontSize: 18, // 字体大小 }); }); ``` 这样就有一个编辑器了。 ## 双向绑定 一般将编辑器封装成一个组件: ```vue <template> <div ref="editorContainer" style="height: 250px; width: 100%"></div> </template> <script setup> import * as monaco from "monaco-editor"; import { onMounted, ref } from "vue"; // 拿到页面元素 const editorContainer = ref(); let editor; onMounted(() => { editor = monaco.editor.create(document.querySelector("#editorContainer"), { value: "// 请在此处编写java代码", // 编辑器默认的内容 language: "java", // 默认的语言 automaticLayout: true, // 自动布局 theme: "vs-dark", // 主题,黑暗 fontSize: 18, // 字体大小 }); }); </script> ``` 然后在其他组件中使用: ```vue <CodeEditor v-model="botAdd.content"></CodeEditor> ``` 使用v-model想要进行数据的双向绑定,所以要在编辑器组件中进行一些设置,获取到父组件传过来的值,监听这个值的变化,来更新编辑器内部值;监听编辑器内部得值得变化,来触发父组件的更新事件,达到双向绑定的结果: ```vue <template> <div ref="editorContainer" style="height: 250px; width: 100%"></div> </template> <script setup> import * as monaco from "monaco-editor"; import { onMounted, watch, onBeforeUnmount, ref } from "vue"; // 获取父组件穿过来的值 const props = defineProps({ modelValue: String, }); // 定义父组件的事件 const emit = defineEmits(["update:modelValue"]); // 拿到页面元素 const editorContainer = ref(); let editor; onMounted(() => { // 创建编辑器 editor = monaco.editor.create(editorContainer.value, { // 编辑器内容的初始值,props.modelValue是父组件穿过来的 value: props.modelValue || "// 请在此处编写java代码", language: "java", // 默认的语言 automaticLayout: true, // 自动布局 theme: "vs-dark", // 主题,黑暗 fontSize: 18, // 字体大小 }); // 当编辑器内容改变时,发出 `update:modelValue` 事件 editor.onDidChangeModelContent(() => { const value = editor.getValue(); emit("update:modelValue", value); }); }); // 在卸载的时候,销毁这个编辑器实例,避免多次引用产生混乱 onBeforeUnmount(() => { if (editor) { editor.dispose(); } }); // 当 `modelValue` 的值改变时,更新编辑器内容 watch( () => props.modelValue, // 监听父组件传来的这个值 (newValue) => { // 发生改变后执行 if (editor && typeof newValue === "string" && newValue !== editor.getValue()) { editor.setValue(newValue); } } ); </script> ``` # v-model绑定的属性 2024.09.21 在Vue中,`v-model`是一个用于表单输入绑定的语法糖。它简化了组件之间的双向数据绑定。`v-model`实际上是以下两个属性的组合: 1. **`value`属性**:用于传递数据给子组件。 2. **`input`事件**:用于在子组件内部更新数据并通知父组件。 ## 绑定原生标签 `v-model`直接用于`<input>`等标签上时,Vue会自动处理绑定值和监听输入事件: ```vue <template> <input v-model="text" /> </template> <script setup> import { ref } from 'vue'; const text = ref(''); </script> ``` + `v-model="text"`:等价于 ```vue <input :value="text" @input="text = $event.target.value" /> ``` 绑定的value属性为text变量,input事件为更新text变量,这样就是双向绑定。 v-model绑定的特殊情况: - **复选框**(`<input type="checkbox">`):`v-model`会绑定到`checked`属性。 - **单选按钮**(`<input type="radio">`):`v-model`会根据`value`属性更新。 - **多选框**(`<select multiple>`):`v-model`会绑定到一个数组。 ## 绑定自定义组件 Vue3中,对于自定义的组件,它会绑定一个`modelValue`属性,并监听一个`update:modelValue`事件来实现双向绑定。 当v-model绑定在自定义的组件上时: ```vue <template> <MyComponent v-model="data" /> </template> <script setup> import { ref } from 'vue'; import MyComponent from './MyComponent.vue'; const data = ref(''); </script> ``` 相当于: ```vue <template> <MyComponent :modelValue="data" @update:modelValue="updateData" /> </template> <script setup> import { ref } from 'vue'; import MyComponent from './MyComponent.vue'; const data = ref(''); function updateData(value) { data.value = value; } </script> ``` - `:modelValue="data"`:将`data`传递给子组件的`modelValue`属性。 - `@update:modelValue="updateData"`:监听子组件的`update:modelValue`事件,并在事件触发时更新`data`。 所以子组件可以这样接收v-model传过来的值: ```vue <template> <input :value="modelValue" @input="$emit('update:modelValue', $event.target.value)" /> </template> <script setup> // 接收父组件穿过来的值 const props = defineProps(['modelValue']); // 父组件的事件 const emit = defineEmits(['update:modelValue']); </script> ``` - 使用`props`接收`modelValue`。 - 使用`$emit`向父组件发送更新事件。 这样就实现了使用v-model的双向绑定。 # Vue3使用emit 2024.09.21 父组件中绑定事件: ```js <ChildComponent @customEvent="handleCustomEvent" /> ``` + ChildComponent:子组件名 + customEvent:自定义事件名称 + handleCustomEvent:事件触发后执行的函数 在没有使用setup的语法糖时,是通过setup函数的第二个参数来使用emit: ```vue <template> <button @click="triggerEvent">触发事件</button> </template> <script> export default { name: "User", setup(props, context) { function triggerEvent() { context.emit("event1", "张三", 50); } return { triggerEvent, }; }, }; </script> ``` 再使用了setup语法糖后,没有了setup函数,和使用props差不多,要想使用emit需要通过defineEmits: ```vue <template> <button @click="handleClick">点击我</button> </template> <script setup> import { defineEmits } from 'vue'; // 定义事件 const emit = defineEmits(['customEvent']); function handleClick() { // 触发事件,并传递参数 emit('customEvent', '传递的数据'); } </script> ``` 可以同时定义多个事件: ```js const emit = defineEmits(['eventOne', 'eventTwo', 'eventThree']); ``` # reactive的响应式 2024.09.20 使用reactive创建的对象是具有响应式的: ```js let bot = reactive({}); ``` 但是不能给对象直接赋值,否则会失去响应式: ```js let other = {}; bot = other; ``` 这样的bot就不会再有响应式了,应该挨个挨个给bot的属性赋值,这样才会保留响应式: ```js Object.keys(bot).forEach(key => { bot[key] = other[key]; }) ``` 或者直接使用Object的assign方法: ```js Object.assign(bot, other); ``` 这个方法要求other和bot中的属性名一致,才能正确赋值。 # Vue的slot插槽 2024.09.10 `<slot>` 元素充当内容分发的插槽。当父组件使用子组件时,可以在子组件的 `<slot>` 元素中插入内容。 ## 基本用法 比如有一个Card组件: ```html <template> <div class="container" id="content"> <div class="card"> <div class="card-body"> <slot></slot> </div> </div> </div> </template> ``` 在另一个组件中使用上面这个Card组件: ```html <template> <div id="app"> <Card> <h1>这是插入到卡片中的内容</h1> <p>这段内容会被插入到子组件的 slot 中。</p> </Card> </div> </template> ``` <Card>标签中的内容都会被放到Card组件中的<slot>标签的位置。 ## 具名插槽 如果Card标签有多个<slot>标签,可以给<slot>标签起名: ```html <template> <div class="container" id="content"> <div class="card"> <div class="card-header"> <slot name="header"></slot> </div> <div class="card-body"> <slot></slot> </div> <div class="card-footer"> <slot name="footer"></slot> </div> </div> </div> </template> ``` 然后使用的时候,就是用<template>标签,标注<slot>的名字: ```html <template> <div id="app"> <Card> <template #header> <h1>这是卡片的头部</h1> </template> <p>这是卡片的主体内容。</p> <template #footer> <p>这是卡片的底部</p> </template> </Card> </div> </template> ``` + `<template #header>` 中template标签只是占位的作用,`#` 是一个语法糖,用来表示 `v-slot` ,用于指定插槽的名字 他们就会被插入到对应的位置中去。 ## 作用域插槽 有时候可能需要将子组件的一些状态或方法暴露给父组件,在这种情况下可以使用作用域插槽: ```html <template> <div class="container" id="content"> <div class="card"> <div class="card-body"> <slot :msg="message"></slot> </div> </div> </div> </template> ``` 以上的message是一个变量,然后在父组件中使用: ```html <template> <div id="app"> <Card v-slot="{ msg }"> <h1>{{ msg }}</h1> </Card> </div> </template> ``` 就可以使用msg变量。 # Vue3自定义指定 2024.09.06 自定义指令分全局和局部的。 全局的是定义在整个Vue实例app上: ```js app.directive("authorize", (el, binding) => { let show = false; store.state.loginUser.buttonPermissions.forEach(button => { if (button === binding.value) { show = true; } }) if (!show) el.style.display = 'none'; }) ``` directive第一个参数是指令的名字,使用的时候前面要加上`v-`,第二个参数是一个回调函数,该函数有两个参数,第一个是绑定当前指令的dom元素,第二个是当前指令绑定的值的对象,使用binding.value可以获得当前指令绑定的值。 注意,如果使用自定义指令绑定一个普通字符串的话,该字符串数据需要被引号引起来,如果是一个变量的话,则不用: ```vue <el-button type="danger" size="small" v-authorize="'clue:delete'" @click="del(scope.row.id)">删除 </el-button> <el-button type="danger" size="small" v-authorize="变量名" @click="del(scope.row.id)">删除 </el-button> ``` 局部实例是在当前组件中定义: ```js export default { setup() { /*...*/ }, directives: { // 在模板中启用 v-focus focus: { /* ... */ } } } ``` 或者在<script setup>里这样写: ```js // 在模板中启用 v-focus const vFocus = { mounted: (el) => el.focus() } ``` # Vue3使用Vuex 安装: ``` npm install vuex ``` 在store/index.js,创建store对象: ```js import {createStore} from "vuex"; export default createStore({ state: { loginUser: {} }, mutations: { LOGIN(state, value) { state.loginUser = value; } }, actions: { login(context, value) { context.commit("LOGIN", value); } }, getters: {} }); ``` 在src/main.js中引入store对象并使用: ```js import store from "./store/index.js"; app.use(store).mount('#app') ``` 在组件中使用: ```js import {useStore} from "vuex"; const store = useStore(); store.dispatch("login", {}); let userId = store.state.loginUser.id; ``` store的数据是存在内存中的,如果刷新了页面,store中的数据就会重置。使用location.href改变地址或者手动刷新按f5,都会让store中的数据消失。而是用路由器切换路由则不会。 # Vue3使用props 在使用这样的写法时: ```vue <script setup> </script> ``` 没有props属性,那么要父组件传过来的值,需要使用defineProps函数,要明确声明 props 的结构: ```js const props = defineProps({ id: { type: Number, required: true, }, name: String }) console.log(props.id) ``` 如果是路由参数,需要使用路由对象来获取: ```js const route = useRoute(); const {id, name} = route.params; console.log(id) ``` # Vue3使用路由 使用useRouter和useRoute获取路由器对象和路由对象: ```js import {useRoute, useRouter} from "vue-router"; const router = useRouter(); const route = useRoute(); ``` useRouter获得的路由器对象是唯一的,整个应用中所有组件获得的路由器对象都是同一个。 useRoute获得的路由对象只是当前激活路由的对象,每一次获取都是一个新的对象。